Interior Explore
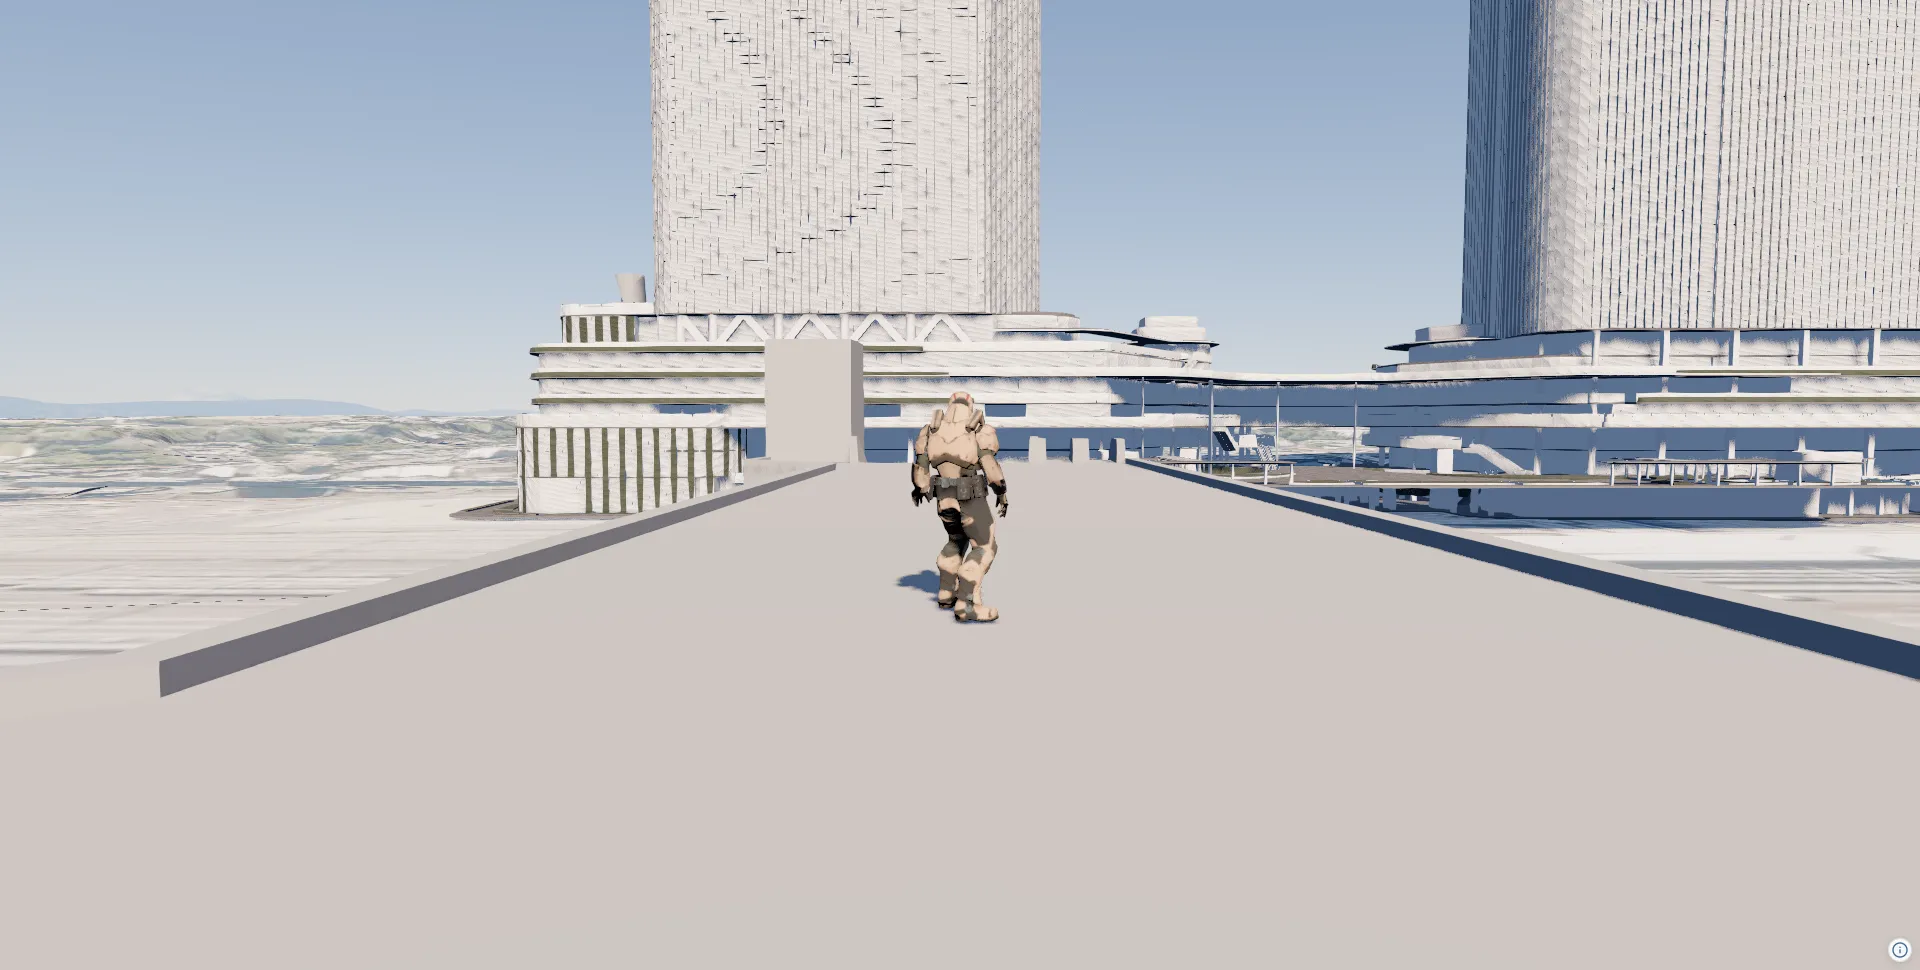
Learn how to build an application that explores the interior of 3D Tiles buildings by controlling a character, using PersonViewPlugin from @navaramap/three-plugins. The plugin lets you wire up character controls with minimal code.
What you will learn in this tutorial:
- Loading 3D Tiles building models
- Driving a GLTF character with
PersonViewPlugin - Letting the character move underground and through buildings
- Switching between third-person and first-person view
- Teleporting the character when the scene changes
Setting Up the Basic Scene
Section titled “Setting Up the Basic Scene”Shadows must be switched on when the ThreeView is constructed. shadow is read once there and cannot be enabled afterwards.
import ThreeView, { Color } from "@navaramap/three";import {  DefaultPlugin,  type DefaultDescriptions,} from "@navaramap/three-default-plugin";import { PersonViewPlugin } from "@navaramap/three-plugins";
const plugin = new DefaultPlugin();const view = new ThreeView<DefaultDescriptions>({  shadow: true,  backgroundColor: new Color().setStyle("#475668"),});view.addPlugin(plugin);
PersonViewPlugin is registered next. Like every plugin, it has to be added before view.init().
Adding the PersonViewPlugin
Section titled “Adding the PersonViewPlugin”The plugin handles the character (model, animation, movement) and the camera. Set minAlt to a negative value so the character can walk below ground level, and choose a tight cameraDistance that works inside a building.
const startLat = 35.6341630282;const startLng = 139.7420527162;const startHeight = 59.05;const startHeading = 288;
const personView = new PersonViewPlugin({  character: {    modelUrl: "/Soldier.glb",    animation: {      idleClip: "Idle",      walkClip: "Walk",      dashClip: "Run",      speed: 1.0,      crossfadeDuration: 0.3,    },    modelRotationOffset: { x: Math.PI / 2, y: 0, z: 0 },    modelScale: 1,    castShadow: true,    receiveShadow: true,  },  moveSpeed: 5,  altSpeed: 5,  rotationSpeed: 2,  cameraDistance: 8,  cameraPitch: 3.4,  cameraLerpSpeed: 4,  minAlt: -1000,  maxAlt: 5000,  startLat,  startLng,  startHeight,  startHeading,  allowCameraControl: true,});
view.addPlugin(personView);await view.init();
view.atmosphere.date.setHours(8);view.toneMappingExposure = 10;
const layers = plugin.addDefaultPhotorealScene();layers.sun.update({  sun: { castShadow: true, shadowFar: 1000, shadowLambda: 1 },});
sun.shadowFar defaults to 50 km, which spreads the shadow cascades so thin that a person-sized shadow never resolves. Setting shadowFar to the range in which the character walks makes the shadow visible.
Adding Terrain and Map Tiles
Section titled “Adding Terrain and Map Tiles”Add terrain and satellite imagery tiles for the exploration area. Turn off the terrain skirt so the underground portion of buildings stays visible.
const terrainSource = view.addSource({  type: "quantized-mesh",  url: "https://terrain.reearth.land/cesium-mesh/ellipsoid/{z}/{x}/{y}.terrain",  requestVertexNormals: true,  maxZoom: 18,});view.addLayer({  type: "terrain",  source: terrainSource,  terrain: {    castShadow: true,    receiveShadow: true,    skirt: false,  },});
const photoSource = view.addSource({  type: "raster-tile",  // Credit:  // - Geospatial Information Authority of Japan Tiles - Latest Nationwide Photo (Seamless)  //   https://maps.gsi.go.jp/development/ichiran.html  url: "https://cyberjapandata.gsi.go.jp/xyz/seamlessphoto/{z}/{x}/{y}.jpg",  maxZoom: 18,});view.addLayer({  type: "raster",  source: photoSource,});
Loading 3D Tiles Building Models
Section titled “Loading 3D Tiles Building Models”Load a Cesium 3D Tiles building such as those published by PLATEAU and enable shadows so the interior reads as a real space.
const buildingSource = view.addSource({ type: "3d-tiles", // Credit: // - [UC23-11] Advanced Area Management Using Storytelling GIS - MLIT PLATEAU // https://www.geospatial.jp/ckan/dataset/plateau-uc23-11 url: "https://assets.cms.plateau.reearth.io/assets/c1/28f9ff-e9d0-44df-b092-88ac7ebdfa42/tngw_4gaiku/tileset.json",});view.addLayer({ type: "3d-tiles", source: buildingSource, model: { show: true, castShadow: true, receiveShadow: true, },});Starting the Plugin
Section titled “Starting the Plugin”This loads the GLTF model and starts the per-frame loop that drives the character and camera.
personView.start();That’s it. The character now responds to the keyboard and the camera follows it.
Default key bindings
| Key | Action |
|---|---|
| W / S | Move forward / backward |
| A / D | Turn left / right |
| Arrow Up / Space | Ascend |
| Arrow Down / Ctrl | Descend |
| Shift | Dash (switches to dashClip) |
| Alt (hold) | Free-orbit camera |
| V | Toggle third-person / first-person |
The default chase view (TPV) is third person. Press V to switch to first person (FPV). The character mesh is hidden automatically. Hold Alt to take manual control of the camera while keeping it focused on the character.
Reacting to Movement
Section titled “Reacting to Movement”The plugin emits the current geographic position, heading, speed, and view mode on every frame. Use onStateChange() to drive UI such as a HUD or a minimap.
const unsubscribe = personView.onStateChange((state) => {  console.log(state.lat, state.lng, state.alt, state.heading, state.mode);});
// Later, when you are doneunsubscribe();
Teleporting Between Scenes
Section titled “Teleporting Between Scenes”Use teleport({ lng, lat, alt, heading? }) to jump the character to a new place, for example when the user picks a different building from a menu. To rotate in place use setHeading(), and to adjust the camera pitch use setCameraPitch() / setFpvPitch().
personView.teleport({ lng: 139.7397, lat: 35.6352, alt: 84 });The chase camera snaps to the new location and the state listener fires once with the updated position.
Complete Example
Section titled “Complete Example”The plugin owns the input, the character, the animation and the camera, so the application code stays short.
import ThreeView, { Color } from "@navaramap/three";import {  DefaultPlugin,  type DefaultDescriptions,} from "@navaramap/three-default-plugin";import { PersonViewPlugin } from "@navaramap/three-plugins";
const plugin = new DefaultPlugin();const view = new ThreeView<DefaultDescriptions>({  shadow: true,  backgroundColor: new Color().setStyle("#475668"),});
const startLat = 35.6341630282;const startLng = 139.7420527162;const startHeight = 59.05;const startHeading = 288;
const personView = new PersonViewPlugin({  character: {    modelUrl: "/Soldier.glb",    animation: {      idleClip: "Idle",      walkClip: "Walk",      dashClip: "Run",      speed: 1.0,      crossfadeDuration: 0.3,    },    modelRotationOffset: { x: Math.PI / 2, y: 0, z: 0 },    modelScale: 1,    castShadow: true,    receiveShadow: true,  },  moveSpeed: 5,  altSpeed: 5,  rotationSpeed: 2,  cameraDistance: 8,  cameraPitch: 3.4,  cameraLerpSpeed: 4,  minAlt: -1000,  maxAlt: 5000,  startLat,  startLng,  startHeight,  startHeading,  allowCameraControl: true,});
view.addPlugin(plugin);view.addPlugin(personView);await view.init();
view.atmosphere.date.setHours(8);view.toneMappingExposure = 10;
const layers = plugin.addDefaultPhotorealScene();layers.sun.update({  sun: { castShadow: true, shadowFar: 1000, shadowLambda: 1 },});
const terrainSource = view.addSource({  type: "quantized-mesh",  url: "https://terrain.reearth.land/cesium-mesh/ellipsoid/{z}/{x}/{y}.terrain",  requestVertexNormals: true,  maxZoom: 18,});view.addLayer({  type: "terrain",  source: terrainSource,  terrain: {    castShadow: true,    receiveShadow: true,    skirt: false,  },});
const photoSource = view.addSource({  type: "raster-tile",  // Credit:  // - Geospatial Information Authority of Japan Tiles - Latest Nationwide Photo (Seamless)  //   https://maps.gsi.go.jp/development/ichiran.html  url: "https://cyberjapandata.gsi.go.jp/xyz/seamlessphoto/{z}/{x}/{y}.jpg",  maxZoom: 18,});view.addLayer({  type: "raster",  source: photoSource,});
const buildingSource = view.addSource({  type: "3d-tiles",  // Credit:  // - [UC23-11] Advanced Area Management Using Storytelling GIS - MLIT PLATEAU  //   https://www.geospatial.jp/ckan/dataset/plateau-uc23-11  url: "https://assets.cms.plateau.reearth.io/assets/c1/28f9ff-e9d0-44df-b092-88ac7ebdfa42/tngw_4gaiku/tileset.json",});view.addLayer({  type: "3d-tiles",  source: buildingSource,  model: {    show: true,    castShadow: true,    receiveShadow: true,  },});
personView.start();